Re-enrollment Quick Start Guide
3-step Re-enrollment Process
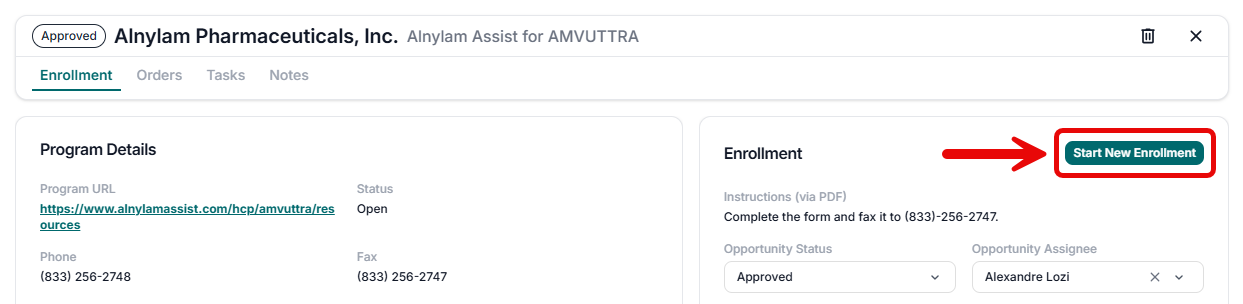
- In the Program Opportunity window click the Start New Enrollment button.
note
To start the re-enrollment process, the existing enrollment status must be either Approved, Denied, or Withdrawn.
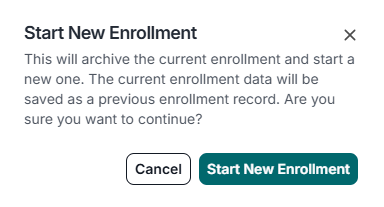
- A notification will appear confirming that you are starting a new enrollment, click the Start New Enrollment button to continue.
- The Enrollment section is now blank and can be populated with re-enrollment status and information to assist in tracking re-enrollment.
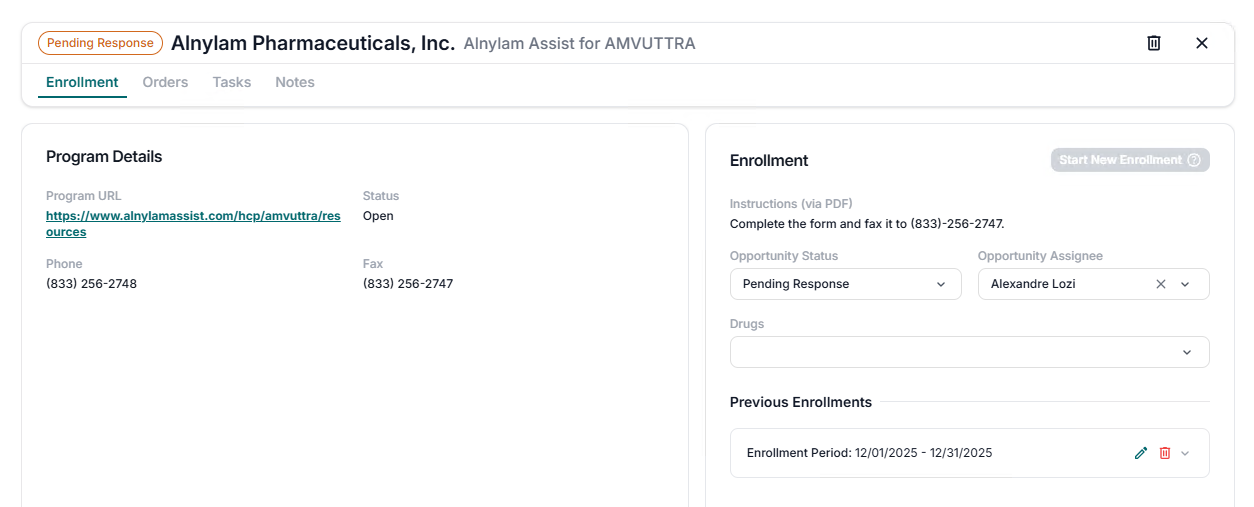
Prior enrollment information will be displayed in the Previous Enrollments section and can be expanded to view additional enrollment details and make edits.
Additional Features
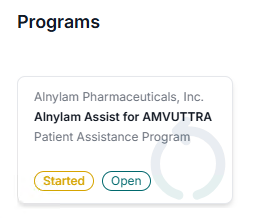
To indicate when a patient’s re-enrollment is in process, you will see a re-enrollment watermark on the patient’s Program enrollment card and an icon near the patient’s name on the Patients Enrolled report.

Once re-enrollment is complete (e.g., patient has been Approved), the re-enrollment icon will disappear.
A new Re-enrollment filter has been added to the Patients Enrolled worklist to quickly find patients who are currently enrolled and re-enrollment is in progress.